💯% sure no one can guess what I have made from my old shoe rack! 🤯🤩 Instead of throwing it away as a waste, a brilliant idea came into my mind and soon I got a charming kitchen shelf I had always been dreaming of! 🤭👌 Now, it is one of the most stylish and practical parts of my kitchen! 🙌😍 I will show the whole process of the transformation in this article! 👇
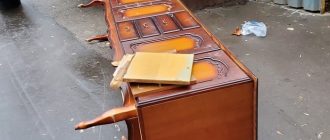
I had an old shoe rack gathering dust, and instead of throwing it away, I saw an opportunity to repurpose it into something useful. With a few modifications, it became a stylish and practical kitchen shelf!

Flipping the Design and Prepping the Surface
To start, I turned the shoe rack upside down and removed its legs. This instantly gave it a sleeker look, making it perfect for wall mounting.
Next, I gave it a thorough cleaning and a light sanding to smooth out the surface. Since I wanted a bright, airy finish, I decided not to preserve the original plywood texture.

Adding Support and a Fresh Coat of Paint
For extra stability, I found a sturdy wooden dowel in our storage shed, cut it to size, and drilled holes into the shelf to secure it.

Before painting, I made sure to clean off any dust and grease. Then, I applied a coat of glossy white acrylic enamel. This type of paint is not only odor-free but also eliminates the need for a finishing varnish.
To add some contrast, I highlighted the previously dark inserts, making the design feel warmer and more inviting. Wanting to personalize the shelf further, I used a stencil to create a delicate design, tracing it carefully with a pencil before filling it in.

To add some contrast, I highlighted the previously dark inserts, making the design feel warmer and more inviting. Wanting to personalize the shelf further, I used a stencil to create a delicate design, tracing it carefully with a pencil before filling it in.
Mounting and Final Touches
My husband helped me attach sturdy hangers to the back, allowing for easy wall installation. Once it was up, I stocked it with my kitchen essentials—spices in a woven basket, a towel, a spatula, and a few everyday items like toothpicks, forks, and a sugar bowl.

A Functional and Stylish Addition to the Kitchen
What started as a forgotten shoe rack is now a charming and practical part of my kitchen. It’s not just a storage solution—it adds character and keeps everything I need within reach. A simple, budget-friendly project that turned out better than I imagined!